I've been printing the bridge calibration object "20mm-hollow-box.stl" found on the http://reprap.org/wiki/Calibration page. The first several attempts looked like this:

I tried adjusting the "Bridges (mm/s)" speed in Slic3r to improve the result. I ended up going from 60 mm/s to 100 mm/s, but really did not see any improvement.
I could see that the walls of the box were flexing when the printer was trying to make the bridge on top, so I suspected that the material was not cooling sufficiently (Note: I do not think that the Slic3r setting for "Slow down if layer print time is below (approximate seconds):" is working, since the layers that print only the walls of the box certainly were printing in less than 15 seconds). So I decided to print four of the boxes at once, to give each one a chance to cool more, and the results were a little improved:

Yet another case for adding a duct and cooling fan . . .
I decided to try and increase the bridge speed setting in Slic3r even more, so I bumped it up to 150 mm/s. This didn't show any noticeable improvement either, and I started to realize that the top speed on the bridges seemed to be the same whether I was at 60 mm/s, 100 mm/s, or 150 mm/s.
I remembered there is an acceleration setting in the Marlin firmware, and with some quick calculations I decided that the acceleration was not allowing the bridge speed to reach its max value, so increasing the max bridge speed was no help.
My acceleration speed (search for "DEFAULT_ACCELERATION" in the Marlin configuration.h file) was at 1000, so I increased it to 2000 and the print looked basically the same as before.

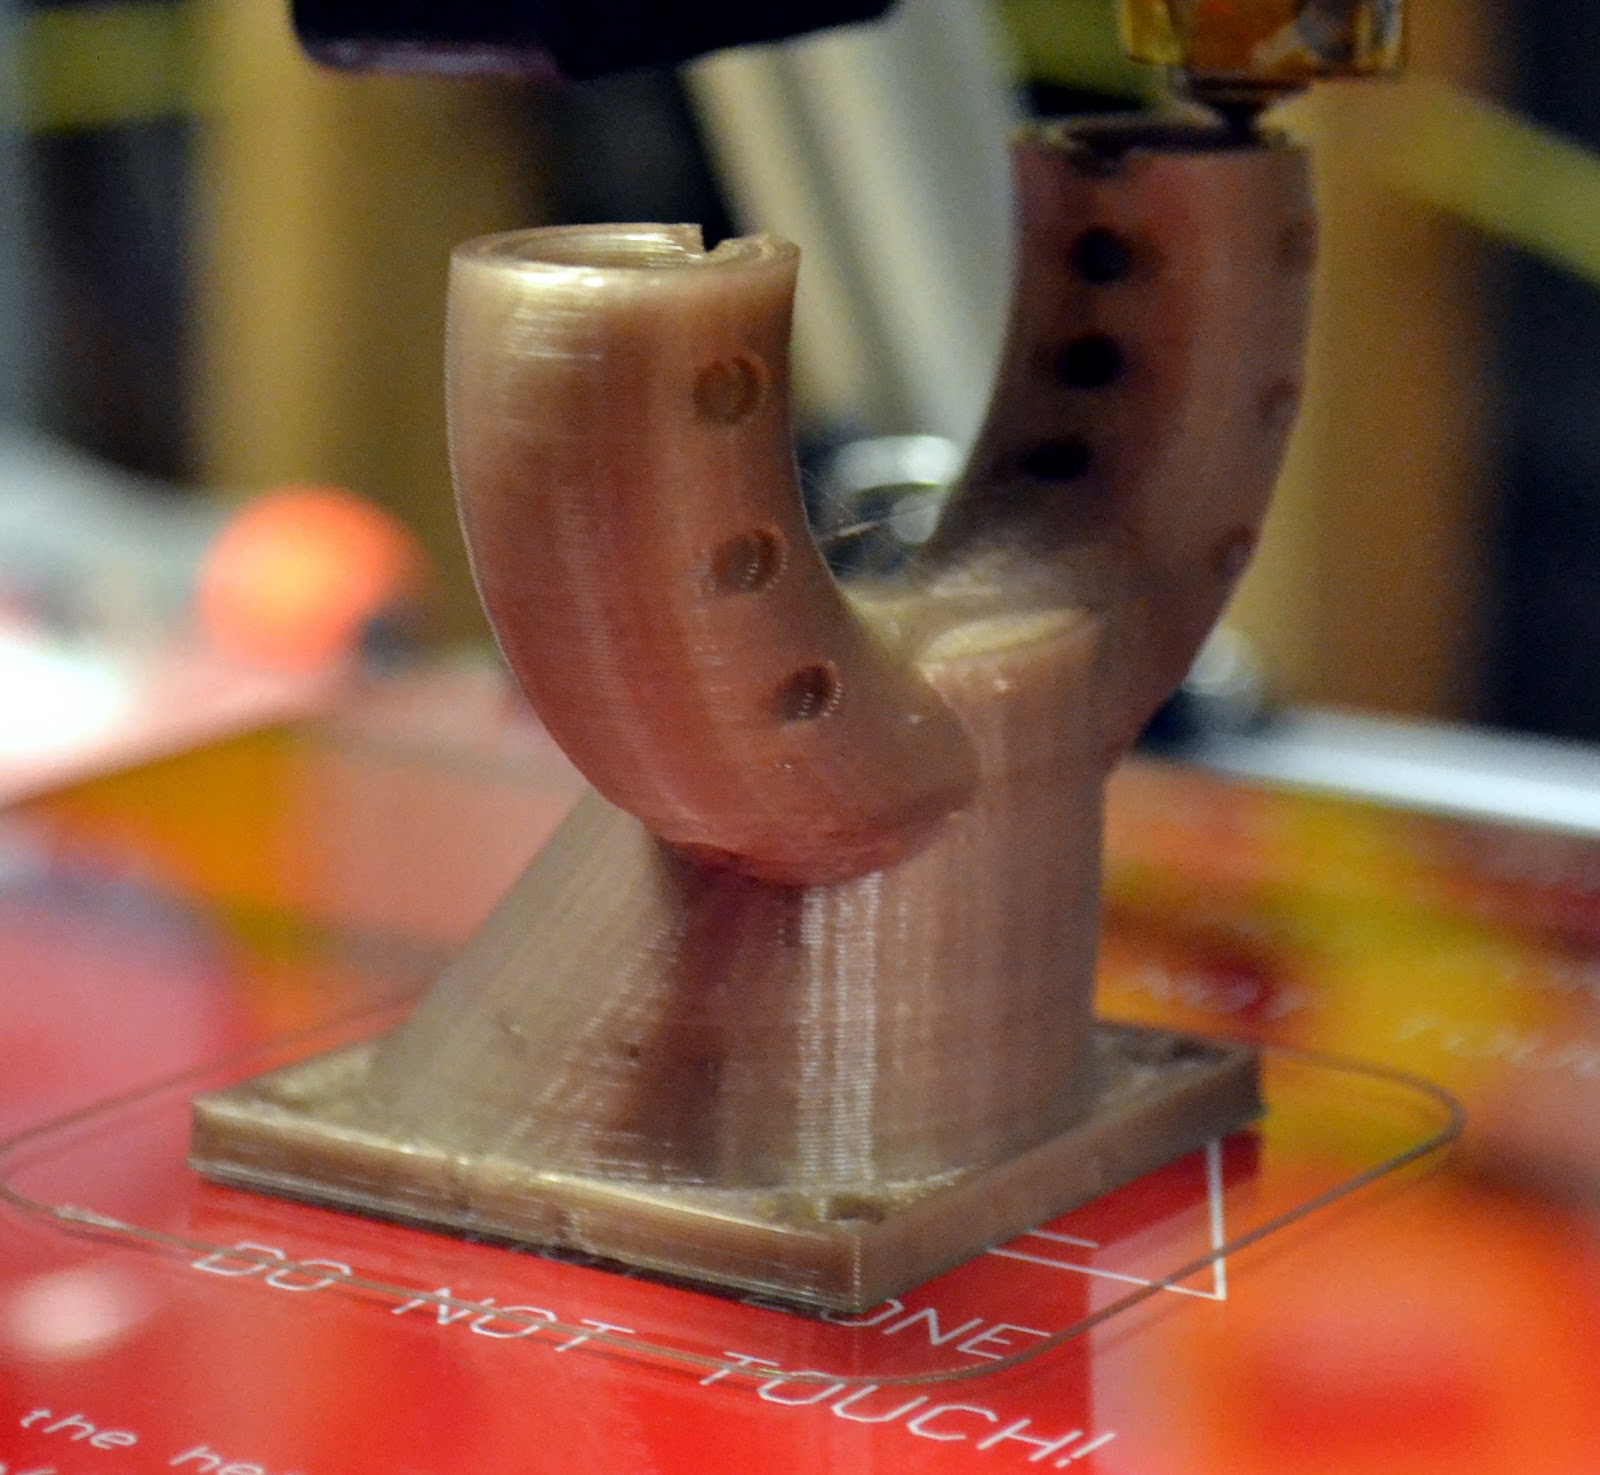
Next I increased it to 5000, and the machine started missing steps--especially on the Y axis--and ended up trying to start printing the bridges in thin air, which didn't work well:

I decided to go lower than where I started, to understand if the bridge speed was as critical as I had thought at the beginning of this exercise, and at 500 mm/s (1/2 of the original setting) I saw no real degradation.

Which again leads me back to a cooling fan . . .
So I decided to get serious about a fan duct. I picked one out on Thingiverse and checked the IRC channel at http://reprap.org/wiki/IRC (this is a great place to go for advice, btw), and decided to go for it.
The part I selected from Thingiverse is the 40 mm fan duct ring at http://www.thingiverse.com/thing:23960 The print went well overall, and looked really nice from the outside. I had to turn a fan on it due to some curling up on the edges when the overhangs started to form. Here are a couple of images taken as it was printing:

I had to leave the basement with about 30 minutes left on the print, but when I was able to come back down I was very relieved to see that it had completed successfully. I did notice that the ring portion that I expected to be circular was a little oblong. Not a good sign. Also, when I held it up to a 40 mm fan to check if the holes aligned, they did not . . .
I imported the .stl file into Sketchup using the STL Importer by Jim Foltz:

And measured the length and width of the base, but the scale of the imported .stl must have been off in Sketchup. I realized that the square base was likely supposed to be 40 mm square so that it would be flush with the outline of a 40 mm fan housing. Anyway, the base of my print measures 44.5 mm square, off by a good 10%.
Seems like I would have calibrated the X and Y axis movement distances before now, doesn't it? Well at least I know what I'm doing next . . .
D
No comments:
Post a Comment